Monday, January 30, 2012

Here's what happened...

Last Sunday I didn't want to just sit around doing nothing while my "go to" photographer collaborator had soccer commitments. I wanted to do some fun make-up, and I decided I would just see if someone would be willing to show up and we could "play".  And I would take some snaps of the make-up, available light kind of thing.

So I asked Renata, who is a gorgeous model (inside and out) I've worked with before if she wanted to play, and she said she was in.

Then I decided I wanted to explore a theme for the make-up, sleeping, and her eyes would be closed "dreaming" for all the shots. Then I thought... hm... wardrobe... and I called another friend, Natalie to see if she was in for a play day. And, happily, she was! So, we were all set to play on Sunday and then I realized I needed some help if I was going to take the kind of shots I wanted.

I knew the compositions and poses I was after, and the make-up, but the photography... I needed a turbo course in camera settings! Fred to the rescue. He gave me a basic course on the settings and how to manipulate them on his camera to be able to work in the lower light conditions (dark rainy day). He's a supportive guy, I have to say.

So, Natalie and Renata were a dream to create with, the images are sweet and dreamy, I had a lot of fun, and I know that I will always prefer to work with great photographers I get to collaborate with (especially with anything trickier than available light)... I just had to get some of that posing out of my system!

Anyway, that's how it happened, and no, I'm not planning on being a photographer now. I much prefer to be an art director!


styling - Natalie Tusznio
hair/make-up, photography - me
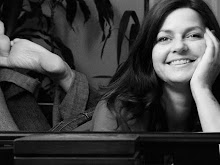
model - Renata @ Liz Bell

Tuesday, January 24, 2012

Antler Angel

As promised... the final shots. You can also go to Fred's blog for the photographer's take on this project. While you're there, take a few minutes to peruse all the other beautiful images he has posted. :)


Muse - Kristy J

Monday, January 23, 2012

"prop"er shoot

I LOVE MAKING PROPS!

Sometimes you just need to emphasize the obvious. Sometimes I think I'd be happiest making props all day long if I could make a living at it. Then again, I also love art directing... and make-up... and design... sigh. Does a person ever really know what they will be when they grow up?

Back to props. I recently decided that I needed to make antler angel wings, kind of an Artemis hunter-goddess thing, I guess.

I found some antlers on my favourite prop source of all time, Craigslist, and Fred and I made the journey to Langley to get them. As it turns out there were several sets, so I picked through the choices, weighed and squinted, until I was satisfied I had selected the "ultimate" rack. Larry, the antler source, told us they're whitetail (lighter colour, denser/heavier material) and that he'd acquired them from an estate sale of some old fellow who had them in a shed. So, they're vintage, which is even better! :)

Value Village was the first stop to find a matching pair of
genuine leather belts to construct the harness.
An internet search recommended Barge contact cement for leather to
leather, so a second trip to the stores for that, plus some leather laces.
Every good project involves chocolate and cappuccinos.


I glued the cut pieces of leather together and Fred helped me
clamp them to set overnight for maximum hold.
After scraping the dried icky bits and cleaning, then oiling the
antlers, I took a rasp file to them to flatten the back and remove
any sharp parts that might be felt through the leather.
The glued harness as it appeared once I removed the clamps...
sadly the glue was still gooey, so I needed to rivet the straps.
Fortunately, Fred had the tools handy for me to drill holes and
rivet the harness. I also drilled holes for strapping on the antlers.
Here is the riveted harness with antlers strapped on.
And the final antler wing harness after I painted on some
"antiquing" white paint to blend better with the antler colour.
Fitting the harness to Kristy before doing the hair and make-up.
And that's as far as I can take you tonight. Tomorrow (hopefully) I'll blog the final images from the shoot. Fred shot this session as collodian wet plate ambrotypes, and the plates are still curing before they are hard enough to scan, so I'll have to be patient and wait to share them.


Wednesday, January 11, 2012

Black Magic Portraits

Lately our studio has become a hotbed of archaic photography. Fred is obsessed with his large-format wet plate process, and I'm frequently swept up in it too, as stylist, make-up artist, assistant, set dec, coffee-maker.

Not only is it a fascinating process in its own right, with almost ethereal qualities to the final product, but the session itself is a step back in time in pace and quality.

Each image takes about 20 minutes to a half hour to create... and that's counted after the dark room has been set up ahead of time, the chemical batches concocted and all the glass plates prepared (each plate taking about 15 minutes).

 
When the portrait subject arrives, Fred chats a bit about the upcoming process and then I apply make-up, or just touch-ups, "analog retouching" as it were. When the image is actually made, it is a physical object - as is - and you can't touch it up afterwards, so any concealer or adjustments need to be made ahead of the capture. Also, the process tends to darken reds, so blemishes, rosy noses, etc. not only show up, but are sometimes darker than in real life. And really, it's not fair that a passing pimple remain on your image for 150 years, is it? Therefore, even the boys get a light concealer application. :)


Each custom setting is generally organized and propped ahead of time, as is the lighting set-up, so Fred starts working with the subject to settle on a pose, roughs in his focus, and leaves to sensitize the first plate. I stay to chat and do final touch-ups. When Fred returns, the pose is recreated, final focus made, then... stay still! For anywhere from about 10 seconds to 2 minutes, depending on too many factors for me to know or list. Fred and I both also stay still so as not to distract the subject: it's imperative for a sharp image that they not move.


Once the time is up, Fred removes the camera back with the undeveloped plate and returns to the dark room, while the subject and I relax and wait. I usually make tea or coffee, and have some lovely chats in the spaces between image captures. But everything else is secondary to the moment when Fred appears with the (literally) dripping wet developed plate and we gather around to look. In its native form, the glass is clear and the image more like a negative, but viewed with a black cloth behind it, the image pops out as a positive, and that first view is like magic.


Sometimes a technical glitch will require shooting a second plate, occasionally an adjustment to lighting or pose, but for the most part this whole process is geared toward one capture, one final, lasting unique portrait.


I think I may be obsessed, too.